Posted on 2 Comments

Plein air Tip Video: Preparing Panels for Painting #Pleinair

Plein air painters have many different surfaces to choose from on which to create their art.

There is duck canvas, linen, canvas panels, linen panels, birch board and many other choices for the outdoor artist.  I’ve tried many of these and have come to my own conclusion and method that works best for my process.  That’s why I like to use gessoed and oil primed hardboard panels for painting plein air.  Some of the benefits of using panels instead of canvas is, they’re portable–you can carry many in a panel holder when travelling–they won’t tear or dent, and they never have the issue of sunlight coming through the back like you can get when you use canvas outdoors.

I made a video that shows how I prepare inexpensive hardboard panels with gesso and oil primer. They make a great surface to paint on. You might want to try using the methods I’m goint to share to see if you like painting on them as much as I do.  Here’s the video if you’re interested:

Posted on 4 Comments

Framing Tips for the #Pleinair Artist

Plein air painting, "Santa Inez at San Elijo" by San Diego artist, Ronald Lee Oliver.

The working artist has to wear many hats, one of which is the “Framers Hat.” The following framing tips show how I treat my paintings to ensure they look professionally done and will serve my clients and galleries well.

If you plan to sell paintings yourself through an online presence without the intermediary of a gallery or other representation, to keep costs down you should know some things about framing.  If you do work with galleries, they will appreciate that your works arrive ready to hang with a professional look, both front and back.

Some tools that will come in handy are:

  1. A Tape Measure.
  2. Wire “Nippers.”
  3. Cordless Drill Driver
Framing Tips. A typical 16x20 panel in a quality, wooden frame.
A typical 16×20 panel in a quality, wooden frame.

I use stainless steel hardware that will never rust. You don’t want your reputation tarnished by rusty parts a few years down the road.  Usually I paint en plein air on hardboard panels as seen in the photo.  Panels are portable, easy to mount and will not tear like a canvas could.  It’s also easy to sign, date and add any other info to the back of the painting with a permanent “Sharpie” type marker.

Here’s a closer look at the information I put on my panels…

Framing Tips

I like to add:

  1. The Title.
  2. My Signature(s).
  3. The Date and Place I Painted the Painting.
  4. A Copyright Symbol and Year.
  5. What I Used to Conserve the Painting.

In this case I used Dammar Varnish, so I’ve written that down in the lower right on the back of the panel.  This will help future owners and conservators when it comes time to clean and re-seal the painting.  They will know what solvents and cleaners are necessary to do their work and will appreciate that I’ve helped them out with this message.
Framing TipsYou can see the screws I use are stainless steel, self tapping #6×3/8″.  I prefer using these short screws because some frames have very thin face material and longer screws can actually penetrate through the front and ruin a costly frame.  That’s not good!  The 3/8 length is strong enough to hold most any painting up to about 18×24 inches.  Beyond that, you may want to ensure your frames are more substantial and can take the longer screws without any issues. I don’t think the 3/8″ screws are adequate to hold larger, heavier frames.  You can also see the “offset clip” I’ve used to hold the panel tightly in the frame opening. These clips come in different offset depths and it’s good to have an assortment because frames have differing rabbet depths and sometimes you may use a thicker panel or canvas so it’s good to be prepared.
Framing Tips

I like the single-eye, D-Ring style, stainless steel hangers. These too are strong enough to hold small to medium-sized paintings but if you frame larger works, it would be good to get the heavy-duty hangers with two screw holes, so you can be assured they will hold the extra weight.

Framing Tips

You can see the tips of the self-tapping screws in this photo. No need to pre-drill pilot holes when using these–saves lots of time.  Just put the screw on the magnetic tip of your drill driver and place it where you want, then pull the trigger…in it goes!
Framing Tips

I think it’s best to use vinyl-coated framers wire for the hanging wire.  It protects your fingers (and your clients) as well as makes the installation easier.  If you’ve ever had your finger pricked or had a strand of framing wire go under your fingernail, you’ll know why I recommend this 🙂

I use a slip-knot loop to attach the wire to the D-Rings at both ends.  Leave about 4 or 5 inches of extra wire at each end in addition to the length needed to span the width from the D-Rings at each side.
Framing Tips

Tighten up the slip-knot, then wrap the extra wire around the main length about a 10 or 12 times…
Framing Tips

then cinch it down tight and cut off the excess, leaving a nice presentation with no fly-away ends.  The D-Rings should be placed as near to the edge of the frame as possible without showing.  This ensures that the painting hangs close to the wall.
Framing Tips

I also like to add a business card with my web URL on it glued to the back.  I use simple white glue for this because it will hold up well and dries clear.
Framing TipsThe finished wire should be good and taught without much slack.  Here you can see that with the D-Rings about 6 inches from the top of the frame, the wire flexes up when hanging by less than two inches, leaving about 4 inches of room for the hanger to be hidden from the top of the painting.  This also makes sure that the top of the frame does not drift away from the wall.
Framing Tips

That’s it!  It’s not too difficult to Do It Yourself and make sure your art will hang correctly and with a professional appearance.  Your clients and galleries will appreciate your art all the much more when it’s framed and ready to hang with professional, quality materials and techniques.

Posted on Leave a comment

Five Plein Air Painting Tips for the Beginning Plein Air Painter

The act of plein air painting is an acquired taste.

Many artists see plein air painters at their easels in the open air, capturing the light and essence of a beautiful, natural scene before them and think, “I will do that some day!”

Little do they know that painting in the open air has its own specific challenges that make it much different from attacking a canvas in the relative comfort and the steady, even lighting of their studio.  Still, plein air painting can be very rewarding for the creative soul and is well worth the effort to develop some proficiency in it as an art.  Following are five “tips” for the beginning plein air painting admirer that just may help them become a plein air aficionado.

1.)  Start small.

It is far easier to manage a small canvas and a small kit when a beginner, rather than diving in to tackle large canvasses or elaborate outdoor easels. When beginning, you are testing the waters and it makes sense to keep it simple to find if plein air is the right avenue for you. Expensive kits and brushes are not necessary to start.   An inexpensive half box french easel and 6×8 in. canvas panels or hard boards and a cheap set of hog bristle, long-handled brushes are a good beginning.

2.) Use artist grade paints.

Student grade paints will cause more frustration than learning as a beginner.  They have difficult consistency and do not mix or thin well as artist grade paints do. There are some very good quality artist grade oil paints, such as Gamblin and Rembrandt that are reasonably priced.

3.) Use a limited palette.

A split-primary palette is a good palette for the plein air painter (even for the seasoned veteran). A split primary consists of a  both a warm and cool, single pigment choice for the three primary colors–Red, Yellow and Blue.  Add a black, yellow ochre, and transparent red oxide and you have a very good start with only 9 colors and of course titanium white. Later on, you may wish to expand your palette with some specialty or convenience colors.  Learn what the symbols and numbers mean on the paint tubes.  There is much to learn about pigment properties such as transparency, light fastness, and mixing qualities.

4.)  Composition is half the battle.

A poorly composed painting, no matter how adroitly painted, will read as a failure.  Read up or web search for terms such as “rule of thirds,” “the golden section,” “avoiding tangents,” “focal points,” “lost and hard edges” among others.  It’s always good to have a “center of interest” in your composition but that certainly doesn’t mean it should be plopped dead center in your canvas, which is generally the wrong thing to do.  Avoid placing elements along the side of the frame or bisected by the outer perimeter of your composition.  And finally, remember…rules are meant to be broken but break them consciously and for good reason, rather than by accident.

5.)  Consider water mixable.

As a beginner, you have the opportunity to forego the hazards and hassles of working with oils and solvents with your paints.   There are some excellent water mixable oil paints that will allow you to make professional quality paintings that cannot be distinguished from those made with the traditional oil and solvent media.  Cobra and Holbein are two brands with good reviews for water mixable.  They also offer water mixable mediums and impasto gels.  As a beginner it may make sense to commit to learning and working from the beginning, with the water mixable products, rather than delve into the world of mineral spirits and turpentine.

These are just a few sound pieces of advice for the beginner who is enchanted by the sight of a painter standing at an easel in the open air of a natural scene.  That’s where it begins…with the will to do, to be, to create outdoors at an easel–making the first steps to acquire your “kit,” then actually taking it to an inspiring place and taking the leap.  There is a great deal to learn, but it is “so worth” every minute you will spend painting “en plein air!”
 

Posted on Leave a comment

Old Mission (Padre) Dam Painting Demonstration

Old Padre Dam

a photo essay

I and two other artists will be doing live demonstrations of plein air painting techniques–free to the public.  The demos will take place at the annual San Diego River Foundation “River Days,” celebration this Saturday, May 14th in the Mission Gorge Regional Park at Old Padre Dam. The demos happen 8:00am to 11:00am. Here are some “clickable” photos I took on a showery May morning to urge you to come out and see the beautiful setting of the park and learn a bit about how to create scenic art in the open air.

Posted on Leave a comment

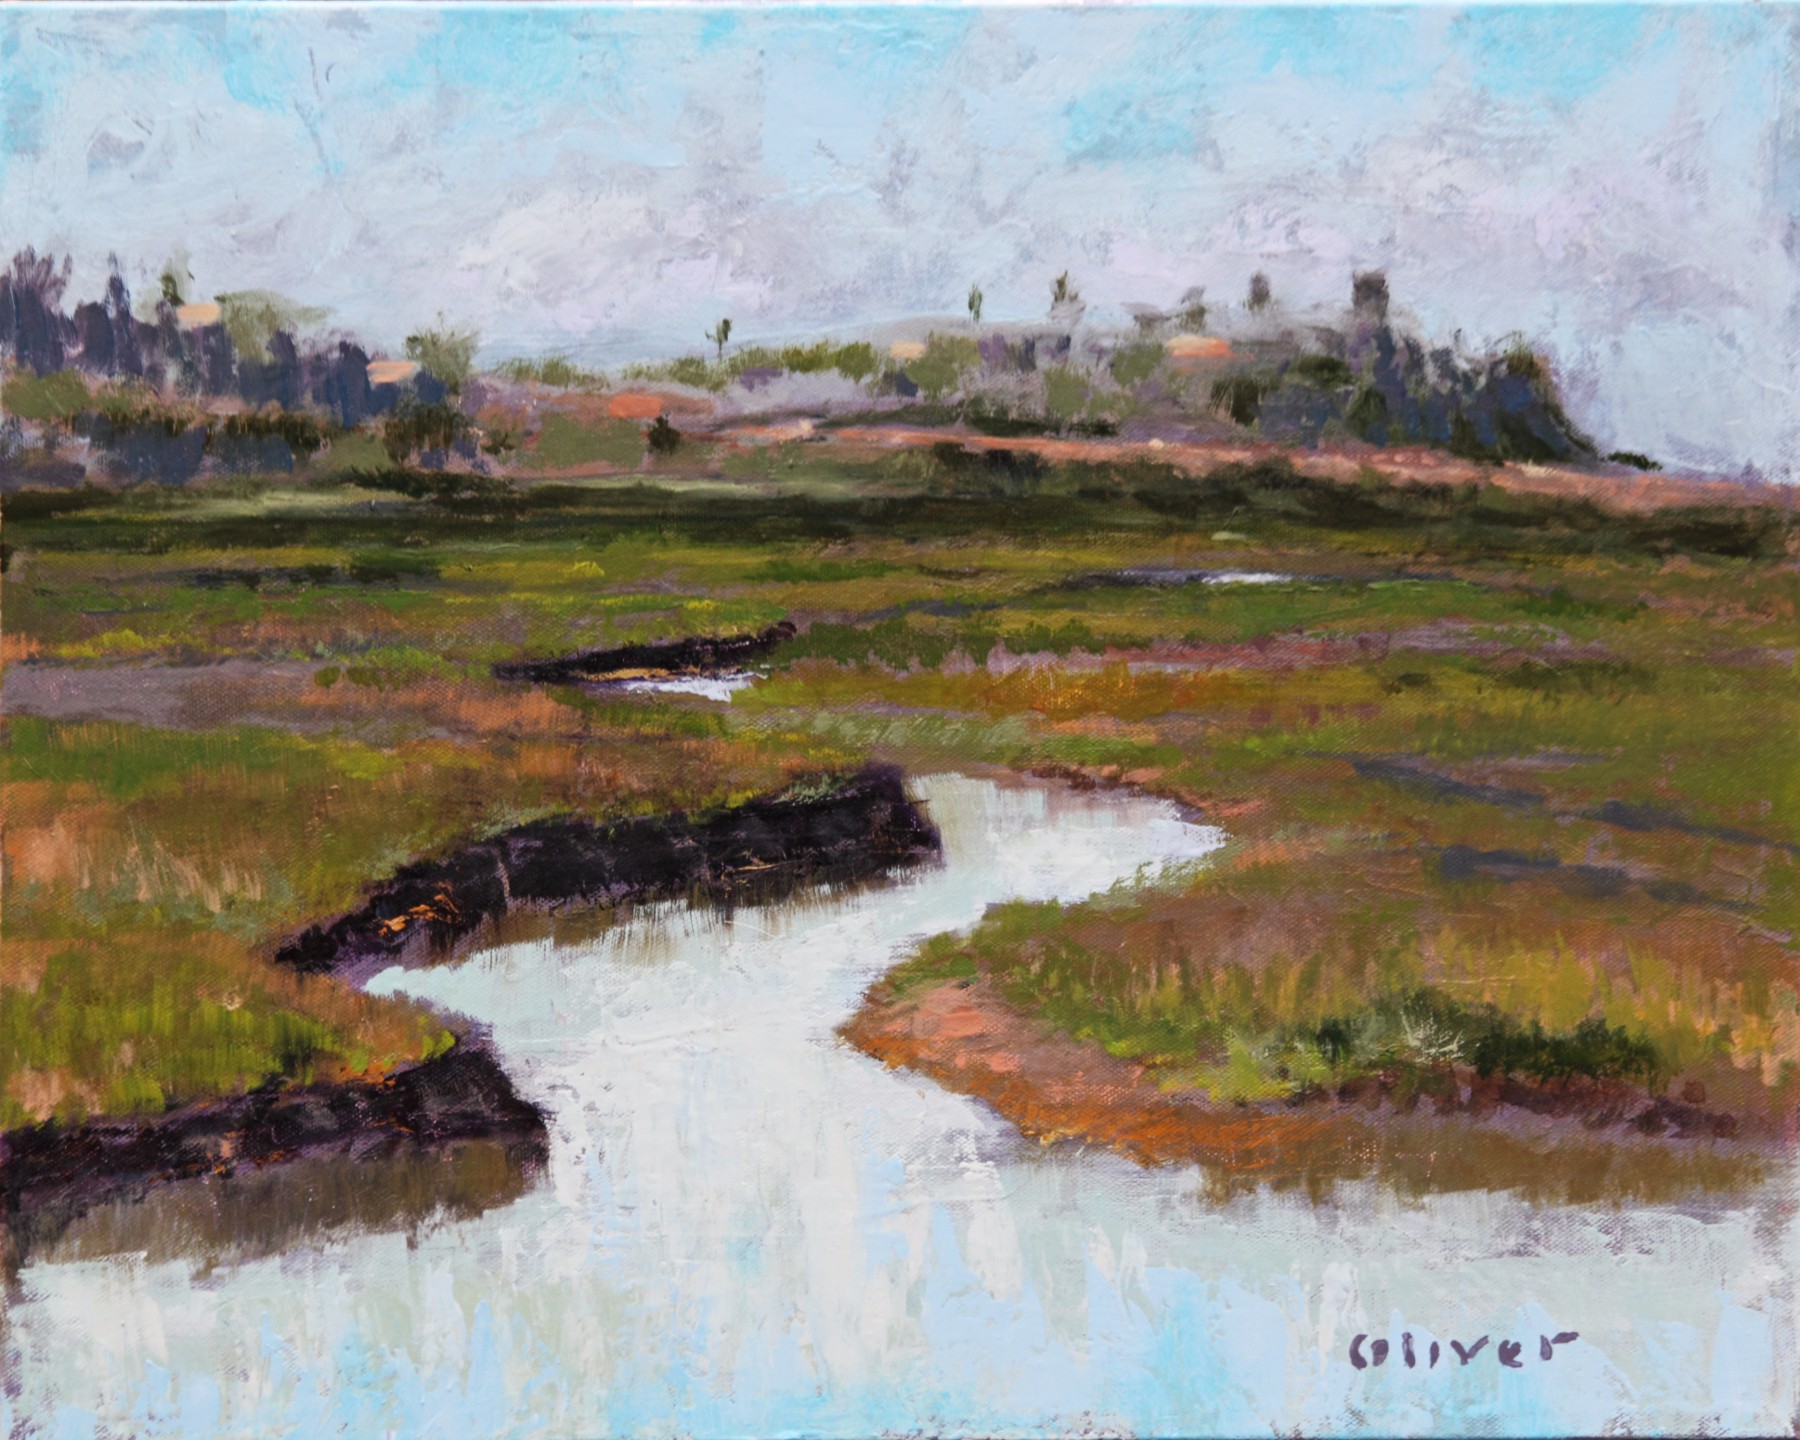
San Diego Plein air at San Elijo Lagoon

San Elijo Morning ~ San Diego plein air painting with studio finish by Ronald Lee Oliver

San Diego has some great places for a plein air painter to set up their easel and create fantastic landscape art.  One of my personal favorite places to paint en plein air (a French term that is universally used to describe the process of painting at an easel in the open air to capture a sense of light and place) is at the San Elijo Lagoon Interpretive Center.  There is a very well maintained trail and boardwalk that puts the painter in a beautiful setting with a minimal amount of hiking effort.

Here’s a video I took, early on the spectacular April morning of this plein air outing.  You can see my easel, parked and ready to go–the 20×16 inch canvas, primed with a purple-grey undertone.

It really is such a wonderful place to paint, the problem is in selecting a composition from the many choices presented.  An interesting sinuous pattern created by the meandering estuary caught my eye and I decided to park my easel to find a composition that included it.

Ronald Lee Oliver plein air easel

I focused on a particular part of the view that I thought would make for a pleasing result…

Selecting a Composition

Of course, I did’t paint exactly what is in the framing box above, because while it is a pretty view, it is a photograph and not a painting. As an artist painter, I have license to arrange and to subdue or emphasize elements to fit my impressionistic depiction as I choose to frame it on the canvas.  It is this personal expression of omission or embellishment that makes painting an impressionist art, and not a craft.  Another artist, standing next to me, would bring their own interpretation to the very same view and create an image entirely their own.  Successfully finding this balance between representation and impression is the great joy and challenge of painting in the open air.

Here is how the painting looked when I decided to stop, take it home, ponder it for a few days and finish in studio.

San Elijo Morning ~work in progress

…and here is the painting after several days of rumination and the finish in the studio.

San Elijo Morning ~ 20×16 in. oil on canvas by Ronald Lee Oliver

San Elijo Morning 20x16 in. plein air by Ronald Lee Oliver
San Elijo Morning ~ 20×16 in. plein air by Ronald Lee Oliver


Posted on Leave a comment

Working Swiftly in Plein Air Painting ~ San Elijo Lagoon

An evening plein air painting at San Elijo Lagoon
An evening plein air painting at San Elijo Lagoon 11×14 in. oil on panel

One of the challenges of plein air painting is working within a limited budget of time. The interplay of a moving sun and fleeting clouds make swift work integral to capturing the scene.  A changing scene may force the painter to work from memory, which is not as accurate as direct observation.  And after all, really, who has the stamina (or is it the lunacy?) to paint for hours out in the elements?  Thank goodness, most of my plein air painting sessions finish in under two hours, before I can become dehydrated and sunburnt.  I completed this 11×14 inch plein air painting of San Elijo Lagoon in about an hour and a half. Having a pre-toned (a neutral gray) substrate helped the work to go quickly because there was no “white space” to cover and the toned background filled in the gaps in the superseding paint layers.

My goal in painting in plein air is not to make a photo-realistic depiction of the scene but rather to suggest something truthful, with expression but that also looks good when framed and hung on a wall.  Plein air painting provides the added benefit of being stretched by new challenges but also keeping the “chops” tuned for studio work.

The San Elijo lagoon and nature center is one of the great places in San Diego to visit at twilight. Either early in the morning or in the evening before sunset, hiking the well maintained trails and boardwalk there is a peaceful and fascinating experience.  You will see the play of the wind on the surface of the tidal waters and the fronds of the grasses in the marsh.  Reflections of light, dance, shimmer and change with each breath of wind. The silence is ocassionally broken by the cry of foraging birds or the sudden splash of fish jumping out of the water.

San Elijo Evening 11×14 oil on panel

image

by San Diego Plein Air Painter, Ronald Lee Oliver

Posted on Leave a comment

After the Rains ~ Plein air Painting at the San Diego River

After the Rains ~ Plein air by Ronald Lee Oliver

The above painting, “After the Rains,” was completed and signed in the field on Saturday, the 9th of May 2015.  I painted this as my part of a plein air painting demo, where I was involved as part of a team of plein air painters from the San Diego Plein Air Painters Meetup Group. We were helping to commemorate the San Diego River Days Festival, which takes place each year, raising money and awareness about conserving the River and its wetlands .

This painting demonstrates a few principles of an effective plein air painting:

  • simplicity of design
  • balanced composition
  • colors and values true to the subject
  • atmospheric perspective
  • suggested (and not rendered) imagery
  • confident brush strokes
  • mystery

…the latter being that elusive quality that teases the viewers mind by allowing them to “fill in the blanks” and resolve the story of the image with their own narrative.  There’s nothing more satisfying for the mind than solving a puzzle, so I’m a big proponent of “allowing the paint to be paint” and the brush strokes to suggest form rather than dictate it.  This allows the mind to engage and play with the imagery and have a satisfying experience that provides new discoveries with each viewing.

Here’s a few pics of me at the easel, talking “plein air” during my demo.

Talking about pre-painting considerations.
Pointing out the Perspective of Clouds

The painting, finished and signed in the field

The painting, finished and signed in the field

Posted on Leave a comment

Artist’s Advice: On the Inner Critic

There is a phenomenon known as “the artist’s curse”–a state of perception in an artist of their own work as inferior and somehow lacking.   It is a virus of self-doubt instilled by the ever-present voice of the inner critic who notes with a jaundiced and magnifying eye only the flaws, imperfections and shortcomings in the execution of a piece of work.  The inner critic measures the latest attempt against past successes, other artists master works, or impossibly high aspirations.  It can lead an artist to destroy perfectly wonderful pieces of their labor in a pique of self loathing and doubt.  I think it must be something like the pathological state of postpartum depression in a mother who has delivered a child.

To combat this disease I believe it’s always best, as an artist, when completing a fresh work to pause, wait a while and put the voice of the inner critic on “mute.”  To let a painting “rest” for a time.  To avoid the temptation of tweaking and making “little fixes” here and there.  To avoid the nagging thought that, “if only I do this…or that…to this painting, it will be better.”  The state of final “finish” is arbitrary and elusive for each work and it is in this hyper-critical state of emotional attachment as we near the culmination of a painting that we can succumb to excessively analytical and even pathologically delusional perceptions of our own work.  It is the time when we most risk the fault of “over working” our piece.  Many a fine painting is ruined in the finish–most often by acting upon the infected perception of the inner critic.  Ironically, it is this sycophantic voice that prods us to “fix” which leads us to ruin and thereby causes us to hate and even destroy the works that somehow do not live up to our expectation.

It’s better to put the brush down and leave a canvas in a semi-finished state that conveys some truth, than to fastidiously pick at little details until the spontaneity, mystery and truth have been thoroughly abused.  By allowing the mind time to rest and detach from the passion of the moment–by muting the inner critic, we may return to comprehend with fresh, unprejudiced eyes, the beauty we’ve been fortunate enough to transmit and share with the world.

We may come to love our work as others do.


Posted on 5 Comments

Plein air painting with the New, Homemade Easel

I plein air painted at Ramona Grasslands with the new portable palette I recently crafted in my workshop. It was the “maiden voyage” for the palette, which I based on the Jim Coulter palette system–a clamshell design with an adjustable mast to hold various sizes of panels or canvas. If you’re not DIY inclined, you can see (and buy) Jim’s version of this plein air painting system, here…

www.artboxandpanel.com

…or another version based on similar concepts is the “Daytripper” easel system by Joshua Been, which you can find here…

joshuabeen.com

I chose to make my own, larger than any available from Jim because I like lots of space to mix and lay out my tools of the trade. It worked out well and even though a large palette, it was not difficult to hike in the half mile with everything I needed to paint.

Chromatic single pigments and earth colors.

The colors seen on the palette, laid on a piece of grey masking tape for friction (to keep them from sliding around) and ease of cleanup, from left to right, are:

cremnitz white
unbleached titanium
Primary magenta — R
cadmium red light — O
Primary yellow — Y
phthalo green-yellow — G
Primary cyan –B
ultramarine deep — I
dioxizine purple –V
yellow ochre
transparent red oxide
Payne’s grey
Mars black

…I also used a bit of “asphaltum.”

The panel was toned in advance with transparent orange.

Following are some photos of the easel, “in the wild,” where I bravely set my tripod over the opening to a den of vicious and possibly rabid squirrels.  You can see the bucket I use to carry all the necessities, too.  Those long, black nylon bags hold the tripod and my umbrella kit (which I didn’t need but brought along just in case). They both have shoulder slings, as does the palette box,which make all three quite easy to portage to the painting site.

RLO portable palette at Ramona Grasslands.

I chose to paint a view of the largest oak tree in the grasslands. You can get an idea of the massive size of this old oak, compared to the heavy-duty, park picnic table nearby.  You can also see here the beginning phase of the painting where I’m establishing the shape of the tree.

Beginning block in of plein air subject.

…and finally, in this next photo you can see where I chose to stop painting.  I was having a difficult time resolving this one.  As I say to myself, “you can’t win them all,” and this one was giving me fits so I decided to pack it in and call it a day.  I’ll take time to let it rest and then return to it in the studio to see if I can make better sense of it.  I didn’t scrape it off entirely, which I would do if it was a total failure, so I think there is still a painting here, waiting to be finished, signed and framed.

Sometimes it's best to stop and reflect...
Sometimes it’s best to stop and reflect…

Here’s a skewed (to avoid glare) iPhone pic of the painting…

A WIP plein air painting by Ronald Lee Oliver
An example of a stopping point in a plein air painting work in progress.

Here’s an update after some studio work on this painting…

The old oak after some studio touches.


Posted on Leave a comment

“Mele Kalikimaka” Hawaiian #Pleinair Painting Trip

Mele Kalikimaka 2014

Mele Kalikimaka is the thing to say
On a bright Hawaiian Christmas Day
That’s the island greeting that we send to you
From the land where palm trees sway…

I guess after all I was not so naughty this year that I wasn’t able to make a Christmastime excursion with my beautiful wife, Jackie, to the Hawaiian Island of Maui.

This wasn’t a “painting only” trip, so I only made time for two 11 x 14 in. panels but they were both lots of fun to paint.  Even though the Trade Winds were fierce during one of the painting sessions, I managed to finish with no mishaps.

Though probably not the wisest thing to do, I diverged from my usual painting methods on this air travel trip and was winging it (no pun intended) with a color palette and paints I had never used before. To lighten the load and simplify things for flying, I chose to go with a five color palette and used water mixable oil paints for the first time.

It was really surprising how well it all worked out!

The colors I brought along were:

Cobra© Water mixable oils

  • Primary Cyan
  • Primary Magenta
  • Primary Yellow

Sennelier©

  • Mars Black  (a warm and fast drying black without the bluish cast of Ivory Black)

Rembrandt©

  • Payne’s Grey (I find it indispensable)

Gamblin©

  • Flake White Replacement (non-toxic and creamy consistency)

Each morning of painting, I pre-mixed a very vibrant chromatic palette from the three water mixable “primaries” which produced some very convincing greens, oranges, and fuchsias, as well as deeper purples.  I was careful not to “overmix” the paint piles, leaving striations of broken color in the mixes.  A sealable “Guerilla Painter” 9 x 12 in. palette tray kept the paint fresh and protected inside my pochade while exploring for a suitable view to paint.

This color palette worked very well and much to my relief, there was no problem mixing the “oil” paints with the water miscible paints.  The Cobra paints especially were surprisingly “creamy” in consistency and were very easy to mix and move about on the panel. While painting, when I felt I needed a little more “flow,” I used a mixture of my standard recipe medium, transported in an eye dropper bottle that consisted of equal parts stand oil, turpentine, and dammar varnish.  I brought no solvents because they must not be flown over (TSA will confiscate)  and it is an extra trip to the hardware store to get some when you arrive and then there’s nowhere to conscientiously dispose of it when you leave.

Another interesting thing about creating these two paintings is that I used one single brush the entire time!  I brought my brush wallet but became so engrossed in the painting process and not wanting to waste any time in capturing the light that I worked only with a single, quarter-inch “bright” hog bristle brush. I held a paper towel sheet in my left hand and wiped the brush clean between different colored passages.  I was able to make a surprising variety of marks with the stiff but springy little bristle bright. The only other implements I used to apply or mark the paint were my finger and in some few instances I removed paint with a cotton swab, which are essentials that I always pack when I paint en plein air.

All said and done, I had a great time in Hawaii and having the opportunity to paint made the trip just that much more special.

I’d like to say to any reader who chanced here and happened to read this far…

Here we know that Christmas
Will be green and bright
The sun to shine by day
And all the stars at night
Mele Kalikimaka is Hawaii’s way
To say Merry Christmas to you!


Posted on Leave a comment

Varnish ~ An Artist’s Hows and Whys

Varnishing a finished painting is a vanishing art.

Many if not most contemporary artists don’t bother, preferring to sell their paintings with a matte finish.  Some don’t like to wait for the paint to dry before the application of varnish, especially since the historical recommendation is to wait six months to a year beforehand. I varnish my paintings 3 to 4 weeks after they are dry to touch.  At that time the paint surface has oxidized and polymerization of the paint has stabilized (there are many studies on this, which I’ve read).  Molecular cross-linking, a form of drying will continue internally, under the paint film and then under varnish, for decades.  I don’t paint with ridiculously thick and deep impasto layers and I also use a medium, mixed with my paints to accelerate the drying oxidation/polymerization process, so I’m not concerned with areas of my paintings cracking or needing a prolonged drying period before varnishing.

I use a traditional dammar varnish–using the same recipe artists have used for centuries–which I make myself with easily obtained ingredients–dammar crystals and turpentine. Dammar crystals are the hardened sap which is gathered from dammar trees in the tropical forests of India and the South-East Asian peninsula and archipelagos.  Here’s a Wikipedia link:

An Article on Dammar Gum

It’s gathered in much the same way Maple syrup farmers tap the trunks of Maple trees to gather the sap, only dammar crystals harden on their own and do not need to be cooked down after harvest.

dammar


Dammar crystals, when burned also make a heavenly incense and if you’ve ever been in a Roman Catholic church on a Holiday or Feast day, you’ve probably smelled the scent of burning dammar crystals (it’s often a blend of dammar with frankincense and myrrh, or a host of other aromatics).  If you get your nose close to the surface of one of my paintings, you can actually get a sense of this fragrance.

To make the varnish, the dammar crystals must be dissolved in a solution of pure gum turpentine (about 2 to 1 turp to crystals), which is in essence the sap of pine trees which has been distilled down to the volatile aromatics and terpenes. I usually make a batch of varnish in an empty, glass pint-sized jar with a tight, screw-on lid.  It takes a few days of occasionally shaking the jar vigorously until all of the crystals are dissolved in suspension. Then, the solution can sit for a day or two until any unwanted particles of bark, dirt or dust settle to the bottom of the jar.  Decanting of the pure varnish is then done to another clean, glass jar, leaving the residue behind.


Diamond G Forest Products makes an Excellent Artist's Grade Turpentine...
Diamond G Forest Products makes an Excellent Artist’s Grade Turpentine…

That’s it!  These two ingredients, both derived from tree sap, together make an excellent, clear varnish which will not only protect the surface of the paint from damage and pollutants such as dust and smoke but is easy to clean and even remove if necessary.

Dammar varnish will yellow slightly, over time (decades) but this can actually give a painting a warm and subtle tone that can in some instances (especially landscapes) enhance the atomosperic aura of the painting. If ever the painting needs re-varnishing, the old varnish is removed with turpentine alone and another fresh coat of dammar varnish is applied.  This should be done by a professional conservator or at least with great care not to remove the paint layer below the coat of varnish, because turpentine will dissolve the paint, even if it has been dry for centuries! Cleaning the surface of a varnished painting can be done with a mild solution of Castile soap and distilled water, using a soft cloth and a gentle touch.

Protecting the paint surface and making it easier to clean aren’t the only benefits of dammar varnish–It also enhances the depth of colors and accentuates the contrast between the light and dark tones in the painting. It provides a translucence, a luster and depth that is the completing step that really makes a painting come to life.

I think finishing a painting with dammar varnish is the right thing to do and shows the artist cares enough about his work that he wants to enhance, protect and preserve it for future generations.

Posted on Leave a comment

The Progress of an Oil Painting ~ “Chanticleer” by Ronald Lee Oliver

"Chanticleer" 16 x 16" Oil on Canvas by Ronald Lee Oliver
“Chanticleer” 18 x 18″ Oil on Canvas by Ronald Lee Oliver (SOLD!)

I’ve recently finished a painting of a proud rooster named “Chanticleer,” who presides over his flock of hens, seen looking on with interest from their nesting boxes. The new day’s dawn is suggested through the window to the outside of the barn.

Having kept backyard chickens for 15 years or so, the subject comes naturally and I was inspired to make a painting that showed not only the proud character of a rooster but also the morning light that invokes the racket he makes to let his hens know the new day has dawned.  This painting evolved from the simple concept of a colorful rooster, well-lit, to capturing a lifelike barnyard moment, very quickly.

Here are some shots of the evolution of the painting’s progress. Roll over the images for captions.

Posted on Leave a comment

Plein air ~ Using a Handy Mahl Stick

Sometimes while painting plein air you need a steady hand to add some detail in an already painted area.  For doing this, there is no other tool that will allow you to rest your brush hand steadily above the work like a handy mahl stick will do.  But how many plein air painters will go to the trouble to carry one?  They’re cumbersome, fragile and just aren’t high on the priority list of things to bring for the always Spartan-minded plein air painter…but wait!  Watch this video for a handy plein air tip that might just change your mind about bringing along a mahl stick.


Posted on Leave a comment

What is a “Cradled” Panel? Fine Art Terminology Explained.

An artist has many choices when it comes to the surface (known as the “support”) and medium they will use to create their artwork. Supports range from papers to woven textiles such as flax linen or cotton duck canvas–to solid supports such as hardwood panels, MDF panels made of compressed wood, or other laminated wood products. They can also choose to apply their medium to glass and metals such as copper or tin panels.

I prefer to either use stretched canvas or various types of hard panels to support my oil paintings.  Often, I refer to something called a “cradled panel,” when I describe the support I’ve chosen for my latest creation and I understand this may be artspeak jargon for some of my readers so I’ll try to explain further.

Cradled panels are wood substrates, either composed of hardwoods or MDF, usually an eight to a quarter-inch thick, which are reinforced with hardwood strips, adhered to the perimeter on the back side of the panel.  This “cradling” is designed to add rigidity to the panel and helps to deter warping or twisting of the panel over time.  This is especially important for larger paintings done on panels as the tendency for a painting on panel to warp or twist is directly proportional to the physical size of the painting.  The larger the panel–the greater the possibility of warping.

Here is a photo of the edge of a cradled panel I recently painted, as seen from the front side:

A cradled panel as seen from the front side.

And here is a view of the same panel as seen from the back side:

A cradled panel seen from the back side.

Not only does the cradling of the panel provide a solid and rigid support that will last for years (centuries) without twisting or warping, it also allows the artwork to be hung without framing as the lip created by the cradle makes an excellent place for a nail or wall anchor to catch.

While cradled panels come in various depths, ranging from 1/4′ to as much as 3 inches, I prefer the 3/4″ deep cradled panels because they will hang readily without a frame but if you do choose to frame the artwork at a later time, frame mouldings with 3/4″ rabbet depths are not as difficult to find, nor are they as expensive as those with the deeper depths.  If a work is intended to never be framed and hung as is in the original cradled panel, it makes sense to go with a deeper cradle.

Hawaiian Sunset 12x12" Oil on Cradled Panel by Ronald Lee Oliver
Hawaiian Sunset 12×12″ Oil on Cradled Panel by Ronald Lee Oliver

Ronald Lee Oliver is a self-taught artist, working in Southern Calfornia.


Posted on 1 Comment

An Artist’s Thoughts on Perseverence

original oil painting, Hawaii, Maui, Whale breaching, artist, Ronald Lee Oliver

“You can’t be all things to all people.” –anonymous

As an artist It is axiomatic that not everyone is going to like your work. It would be ridiculous to believe so. Just as an artist’s own tastes tend to one genre and not another–say impressionism vs. postmodernism–therefore informing their creative approach and style, so do art collectors have personal preferences for one form or the other. That is not to say that some collectors may have a broad range of tastes but in general, the axiom holds true and even for these “eclectic” collectors, your particular brand may not be one which holds their interest. Coming to terms with this as an artist involves staying true to your sensibilities and vision and hence the direction of your work and style but it also necessitates the development of a “thick hide” when it comes to presenting the fruits of your labors to a seemingly indifferent public.

“For any artist to persevere, they must have an enthusiastic audience of at least one.” –Stuart Davis)

When sales have slumped and critical recognition is a scarce commodity, the logic of the above quote by the postmodern artist, Stuart Davis, becomes a guide stone for the artist. If there is that quality in your art which inspires you to continue developing and creating with disregard for recognition and lack of sales–if you see and believe that your art is special and worthy and will avoid the ignominy of the refuse pile of history–if you know your art will endure beyond the temporal tides of trend, fashion and commerce to be found and cherished by those who care enough to display it in an unforeseeable future, then this conviction will fuel the will to persevere, regardless of external encouragements or discouragements.

It is a fine thing to relish receiving encouraging praise, recognition, awards or rewards but when creating works of art that your friends, acquaintances and even strangers think and say are beautiful–but are not selling or finding representation in public venues or galleries–perseverance, born of conviction is paramount and will sustain you. So pick up your stylus of choice and let your creative spirit flow. The proof is in the putting of paint to canvas! From perseverance, reward will come.

Ronald Lee Oliver is a self-taught artist, working in Southern Calfornia.


Posted on 2 Comments

Lindo Lake Update

Many times, while painting a canvas outdoors, for any of a limitless number of reasons there are parts of the scene that are either too complex, distasteful, or simply don’t mesh and balance the composition. It is the artist’s prerogative to include or exclude these items as necessary to meet the end goal of a harmonious and balanced painting. Known as “Artistic License,” this is the artists ability and authority to change the subject to fit the overall goals of the particular presentation according to their own aesthetic whim. That explains how one departs, creatively speaking, from the scene before him which has dreadful apartment dwelling architecture from the early seventies…

Lindo_Panorama

to a simplified and idyllic scene as shown in progress here on the easel…

On the Easel

to a place such as the one depicted here…

Lindo Lake

Thank goodness I don’t feel like I need to paint what I see!

Here is a video demonstration of the actual painting of this piece, on site at Lindo Lake…that’s my wife’s playing the piano in the music background–she also composed the music and arranged the recording.

P.S. Don’t be afraid to use the “like” buttons on the page. They help with getting the word out about the great painter you know 🙂