I plein air painted at Ramona Grasslands with the new portable palette I recently crafted in my workshop. It was the “maiden voyage” for the palette, which I based on the Jim Coulter palette system–a clamshell design with an adjustable mast to hold various sizes of panels or canvas. If you’re not DIY inclined, you can see (and buy) Jim’s version of this plein air painting system, here…
…or another version based on similar concepts is the “Daytripper” easel system by Joshua Been, which you can find here…
I chose to make my own, larger than any available from Jim because I like lots of space to mix and lay out my tools of the trade. It worked out well and even though a large palette, it was not difficult to hike in the half mile with everything I needed to paint.

The colors seen on the palette, laid on a piece of grey masking tape for friction (to keep them from sliding around) and ease of cleanup, from left to right, are:
cremnitz white
unbleached titanium
Primary magenta — R
cadmium red light — O
Primary yellow — Y
phthalo green-yellow — G
Primary cyan –B
ultramarine deep — I
dioxizine purple –V
yellow ochre
transparent red oxide
Payne’s grey
Mars black
…I also used a bit of “asphaltum.”
The panel was toned in advance with transparent orange.
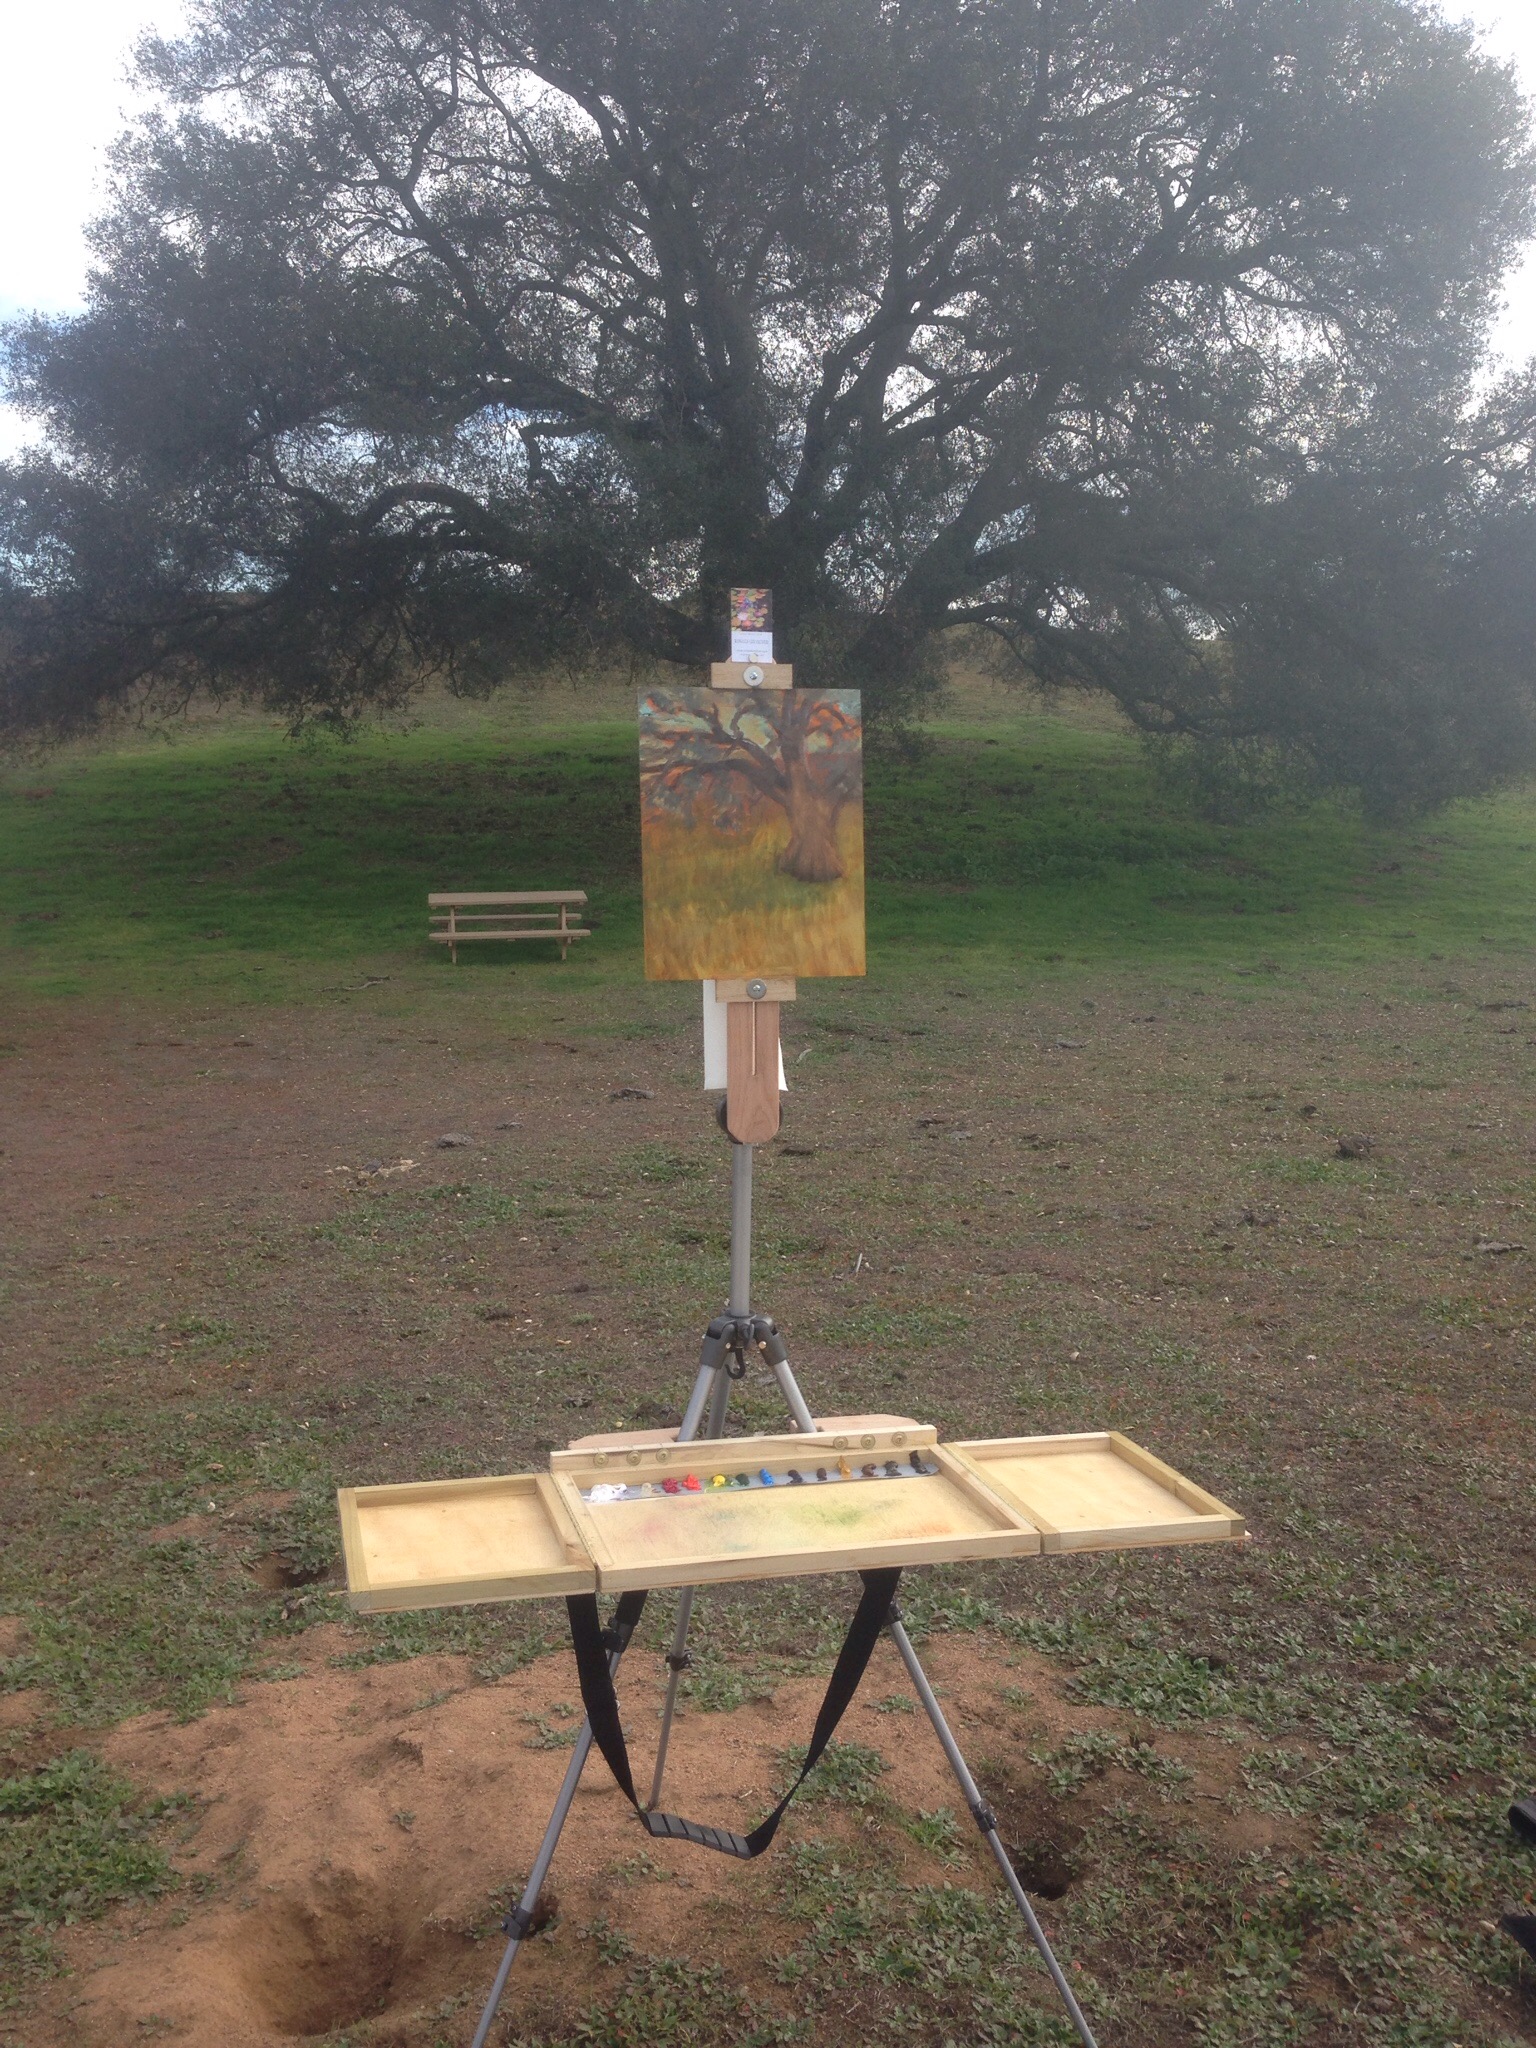
Following are some photos of the easel, “in the wild,” where I bravely set my tripod over the opening to a den of vicious and possibly rabid squirrels. You can see the bucket I use to carry all the necessities, too. Those long, black nylon bags hold the tripod and my umbrella kit (which I didn’t need but brought along just in case). They both have shoulder slings, as does the palette box,which make all three quite easy to portage to the painting site.

I chose to paint a view of the largest oak tree in the grasslands. You can get an idea of the massive size of this old oak, compared to the heavy-duty, park picnic table nearby. You can also see here the beginning phase of the painting where I’m establishing the shape of the tree.

…and finally, in this next photo you can see where I chose to stop painting. I was having a difficult time resolving this one. As I say to myself, “you can’t win them all,” and this one was giving me fits so I decided to pack it in and call it a day. I’ll take time to let it rest and then return to it in the studio to see if I can make better sense of it. I didn’t scrape it off entirely, which I would do if it was a total failure, so I think there is still a painting here, waiting to be finished, signed and framed.

Here’s a skewed (to avoid glare) iPhone pic of the painting…

Here’s an update after some studio work on this painting…


Hello; love the easel you made. I would like to make one too. Appreciate if you would share the plan, list of material etc. How did you attach the edges, were they glued or nailed? Also the dimensions. Hope this is not too much trouble. I am handy but lack the creativity that you have. I have my own tripod which is quite study. Thanks in advance for your assistance.
Apologies for the late response but I hope I’m not too late to provide some food for thought. First, the bad news — I made this easel “from scratch” using a table saw, clamps, and a brad nailer with no plans other than a general idea and the size I wanted it to be. The good news is that there is a much simpler and less masochistic way to make one! First, purchase two “cradled panels” such as these, at your artist’s supply or online.
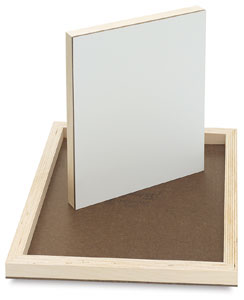
Also get two “piano hinges” of the right length to match the size of the cradled panels. Cut one of the cradled panels in half and you now have the bottom part of the pallete mixing area and the two halves make the “wings that act as the top when closed. Two, twelve by sixteen cradled panels would make a decent sized pochade that would travel well. I would recommend the cradled panels with the 3/4 inch bracing on the back–the deeper ones would make the finished box unwieldy. Ampersand is a brand you should have no trouble finding. You can buy a piece of 3/4 inch square doweling at your home supply store to finish the inside of the two “wings” that will have that part missing after being cut in half. As for the part that attaches to the tripod legs, I recommend a good hard wood, such as red oak because that part bears the weight of everything when in use. I drilled holes then used some long construction screws to attach that to the back edge of the pochade (which I reinforced with a 2 inch by 1/2 inch piece of poplar that was glued and screwed to the back of the bottom panel.
If all of that is too much trouble…you can search online for the Coulter Painting System. There’s an artist named Jim Coulter, who makes these and sells the whole setup, including tripod and backpack for around $300ish. Similarly priced and designed is the Joshua Been “Daytripper” easel system.
I hope this is helpful! Let me know if this cleared things up for you. Feel free to contact me via email if you have any questions. ~RLO
Another easel setup that is similar and available for purchase online is called the “Daytripper Easel.”
Dear Ron,
Exactly what I was looking for. The response above was very helpful ref the palette. For the upright flat piece of hardwood that attaches to the tripod…what hardware/method did you use to do that? I imagine there’s some hardware piece embedded in there that might receive a screw from a quick-release plate, perhaps? I zoomed in on one of your photograph and can’t see anything on the artist-facing side of that flat upright piece.
Anything is helpful.
Thank you, Ron!
Marv – Oregon
Exactly correct, Marv. There is a small, metal, thread reducer. Search BH Photo for “Jobu Adapter Bushing.” I pre-drilled a slightly smaller hole and seated it with a hammer and a little wood glue. I used red oak for the mast, because it is very hard wood that will not flex under load in the wind.